Weekend Foodery

The Mister decided we needed to make bagels this weekend. We prepared the dough on Friday night, and Saturday morning, we boiled and baked them up. The recipe makes 10 bagels. This is how many were left by Sunday evening.

THEY WERE GOOD. Ugly, but good. The recipe we use is by Lauren Groveman. It’s included in the book Baking with Julia, but you can find it on Lauren’s website as well. Homemade bagels are fiddly, but totally worth the several steps and 2-3 hours it takes to make them. Highly recommended if you have the time and inclination.

Then Sunday night, I decided to try out a vegan recipe that I’ve had my eye on for some time now: potato-kale enchiladas from Veganomicon by Isa Chandra Moskowitz and Terry Romero. I’ve said this before, but if you’re in the market for tasty, accessible, healthy vegan food, Isa Chandra Moskowitz is your woman.

This turned out to be another fiddly, multi-step recipe. First, I roasted some pasilla chiles in the oven.

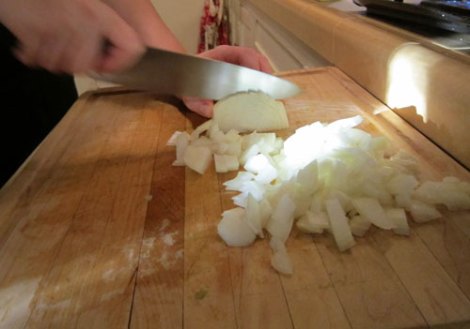
These got blended with sauteed onions, canned tomatoes, and seasonings to create the enchilada sauce.

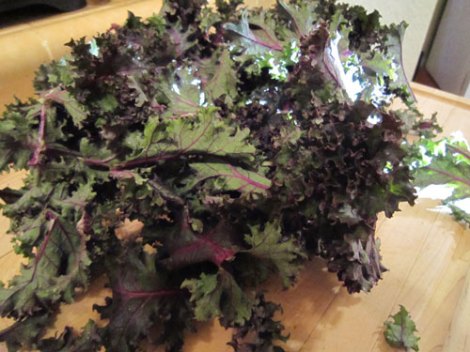
The filling was made from a combination of potatoes and kale. We used red kale, which worked like a charm. I love red kale. It makes excellent kale chips too.

The filling also included some seasonings, and one ingredient that I found somewhat surprising.

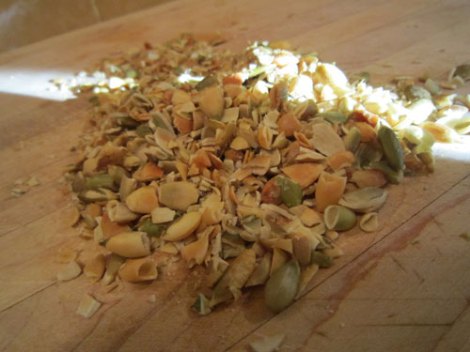
Toasted, chopped pepitas (pumpkin seeds). Interesting, no? They added a really unique flavor and texture to the dish.

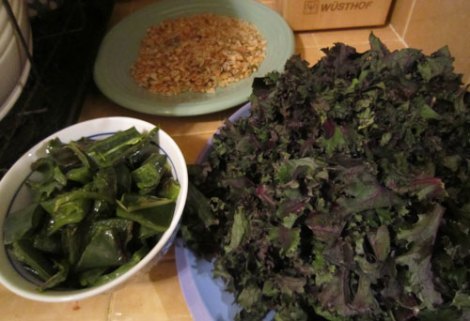
Nice-looking ingredients, eh?

Once the sauce and filling were ready, the Mister and I formed an assembly line. He heated and sauced the tortillas, and I filled and rolled the enchiladas.

They were delicious, although I confess that I de-veganed mine by eating them with dairy sour cream. The Mister put vegan cheese on his. We’ll definitely be making them again.

To conclude: Here is a picture of the cat being shaped like a ball.

Published in: on January 23, 2011 at 10:24 pm  Comments (7)  
Tags: , ,

A Properly Topped Pie

Remember that sweet potato pie I made on Thanksgiving? The one with the topping that tasted delicious, but looked unnervingly like taco meat? Well, I made it again this weekend, this time using regular old brown sugar from the regular old grocery store, rather than organic brown sugar from Whole Foods. And surprise surprise, this time the butter and sugar actually did what they were supposed to do.

Which is to say, they melted together and became a delicious, caramelly goo that actually coated the pecans to form a sticky praline topping, rather than sitting next to the nuts in stubborn, grainy little lumps. Let’s take a closer look, shall we?

As the youth of today would say, “OMNOMNOMNOMNOM.” Are the kids still saying that? At any rate, lesson learned. Do not use fancy-schmancy untested ingredients when trying out new recipes. The pie is absolutely delicious and fairly simple to make. The recipe is here, if you’re interested in trying this procedure at home.

Published in: on January 9, 2011 at 3:02 pm  Comments (6)  
Tags: , ,

In Which We Dig On Swine

As promised … a recap of Thanksgiving dinner!

Ooooooh … steamy!

Mister Principessa is not overly fond of turkey, so only have it every second or third Thanksgiving. This year, we decided to do something meaty. After some research, we settled on Slow-Roasted Pork Shoulder with Melted Apples from Simply Recipes (and apparently originally from the Wall St. Journal … who knew they even PUBLISHED recipes?). This recipe starts with a giant hunk of pig marinated in herbs and seasonings and wrapped in plastic wrap. Vegetarians, avert your eyes.

The meat needed to sit overnight at least, so we got it ready on Wednesday afternoon. The Mister rubbed the seasonings all over it, and then we wrapped it in plastic and stuck it in the fridge. I know from obsessively reading Cook’s Illustrated that this sitting-in-the-fridge period acts as a sort of brine; the salt initially pulls the juices out of the meat, but then the now-salty, flavored juices gradually settle back into the roast, pulling all the flavors of the herbs and garlic with them.

The other thing I did on Wednesday was bake a sweet potato pie. I’d never tried it before, so I figured, what the hell?

The cooking on Thursday got off to a fairly slow start. We knew that our roast would take several hours to cook, so we had a hearty lunch around noon.

This is Mister Principessa’s specialty, The Many-Meat Sandwich. This particular one has turkey, ham, roast beef, and capocollo, along with Havarti cheese, sauteed sweet onion, romaine lettuce, and an heirloom tomato, all on Italian bread from La Brea Bakery. The Mister makes a hell of a sandwich.

Thus fortified, I retrieved the roast from the fridge and prepared its accompaniments. The meat sits on a bed of sliced, seasoned apples and onions, which break down completely in the oven, forming a sort of gravy.

I covered it with foil, and into the oven it went.

While the meat was roasting, I decided to finish off the pie. The recipe included instructions for a topping that sounded really good–pecans coated in melted butter and brown sugar, sort of like pralines. I don’t know if I used the wrong kind of sugar or my heat level was off or what, but it did not work AT ALL. The sugar refused to melt with the butter, and I ended up with chunks of buttery brown sugar that tasted good but looked just like ground beef.

Appetizing, no? No matter–they tasted good and formed sort of a crumble topping. Dutch Sweet Potato Pie, that’s what it was.

About an hour before the roast was done, we got to work on our side dishes. We went with fairly traditional Thanksgiving sides–mashed potatoes, stuffing, and the ubiquitous brown ‘n’ serve rolls–plus wedge salads, which we are very into at the moment. They consist of iceberg lettuce, tomatoes, homemade blue cheese dressing, and our super-secret special ingredient: shitloads of bacon.

Finally the roast was done. We pulled it out and let it rest while the stuffing cooked.

Check out the melty apple-y goodness. And kindly ignore the part of the roast that looks as though it’s been attacked by small rodents. WE HAD TO DO QUALITY CONTROL, OK?

The roast was incredibly good, and I highly recommend it to those of you who are into that kind of thing.

We ate while watching our favorite Thanksgiving show (nice creative photo courtesy of the Mister).

And this morning, we enjoyed a scrumptious post-Thanksgiving breakfast of pie and coffee.

Not too freakin’ shabby. I hope that those of you who celebrate Thanksgiving had a glorious one.

Published in: on November 26, 2010 at 1:45 pm  Comments (14)  
Tags: , ,

Oooooh … Swishy!

Today, I thought we’d take a quick look at another one of my favorite Japanese meals: shabu shabu. Shabu shabu means “swish swish” in Japanese, and it refers to a method of cooking vegetables, tofu, meat, and noodles by swishing them around in a pot of boiling water.

Shabu shabu is very simple to make. First, get yourself some vegetables and cut them into bite-size pieces (or two-bite-size, in some cases). We usually use

  • napa cabbage leaves, sliced into two or three pieces;
  • carrots, cut into sticks (ew … the Mister likes them, but I am not a fan of carrots cooked in water, whether boiled or steamed. Raw? OK. Roasted? OK. Boiled? Elementary school cafeteria food. Not OK.);
  • shiitake mushrooms, cut into thick slices or quartered;
  • enoki/enokidake/enokitake mushrooms, trimmed and separated (the Mister does not care for these);
  • some kind of winter squash (usually kabocha or butternut), peeled and sliced; and
  • onions, cut widthwise–not pole to pole–into thick rings.

You can also use tofu, which I like but the Mister objects to (heat bricks again), and udon or rice noodles. Udon are delicious, but they are very starchy; if you use them, pre-cook and rinse them, and then just dunk them in the boiling water until they’re heated through.

In terms of meat, we pretty much always use beef and/or pork that’s been pre-sliced specifically for shabu shabu (in other words, very thinly). You can find this easily at Japanese markets. You can also use seafood or leave out the meat altogether, especially if you’re including tofu.

Now for the cooking and eating part! Shabu shabu is sort of a “made to order” meal; you cook just a few things at a time, just before you eat them, in a pot of simmering water. So, unless the idea of eating while standing over the stove appeals to you, you’re probably going to want a portable electric burner with a pot of water on top or an electric skillet of some kind. We’ve tried both of these options and found that the skillet works a LOT better. Your mileage may vary. We use an electric wok that looks like this. And yes, it did at one time have two handles.

You can heat your water in the skillet if you don’t mind waiting 100,000 years for it to come to a boil. If you DO mind–and I do–you might want to bring it to a boil first in a kettle and then pour it into your skillet. Once it’s in the skillet, bring it up to a high simmer/very low boil, and add some of the vegetables that will take longer to cook–squash, carrots, onions, that kind of thing. Then take a slice of meat and swish it around in the water until it’s cooked. This will take just a few seconds. You can also cook some of your quicker-cooking vegetables one at a time now too, such as the enoki mushrooms or the napa cabbage.

Now for the best part: the sauces!

Shabu shabu generally comes with two sauces: a sesame sauce (on the left) and ponzu (on the right). The sesame sauce is not unlike peanut sauce, but made with sesame seeds instead of nuts. Ponzu is basically soy sauce seasoned with citrus juice, typically yuzu. It is pretty much my favorite thing in the universe (salty + acidic = WIN!!!). Again, you should be able to find these sauces pretty easily at Japanese/Asian markets. Get out a couple of small bowls–we use large glass custard cups/ramekins–and add your sauce of choice.

When your meat is cooked, dip it in the sauce, or just dump it into the sauce bowl and let it sit there for a couple of minutes while you fish a mushroom or an onion or whatever else you want to eat out of the water. Dunk it all in the sauce and eat! With steamed rice on the side, of course.

If you’re feeling extra-super-fancy, you can add a few aromatics (such as garlic or scallions) to your water at the beginning of the meal. Then, when you’re done eating, you’ll have some nicely flavored water that you can use to make soup, right in the skillet. Skim off any foamy junk, add some udon soup base and precooked udon noodles, and voila! Two meals in one!

Here endeth Japanese Food Week. I hope you found it somewhat useful, or at least interesting. Have a great weekend!

Published in: on November 12, 2010 at 8:12 am  Comments (6)  
Tags: , ,

Oriental Prince In The Land Of Soup

Remember that thing about how I get songs in my head really easily? It happened again. Only this time, it’s not a song, per se … it’s a “crimp” from The Mighty Boosh.

If you’ve never seen The Mighty Boosh, get on it IMMEDIATELY. It is hilarious. And keep your filthy mitts off Vince Noir, played by Noel Fielding, because he is MY pretend boyfriend. I mean, hel-LOOOOO!

Anyway, we’re not here to talk about my undying love for a fictional character. We’re here to talk about miso soup and the making thereof. This recipe might seem a little daunting if you’ve never made it, but it’s really very simple. The hardest part is probably finding the ingredients, which are:

  • Kombu (or konbu) seaweed
  • Bonito flakes
  • Miso paste
  • Wakame seaweed (optional)
  • Tofu (optional)
  • Green onions (optional)

You should be able to find these things in any Asian or Japanese market. You can also find them at large, well-stocked grocery stores, and usually at your hoitier-toitier establishments such as Whole Foods as well.

The first step in making miso soup is making dashi. Dashi is fish stock, and, along with soy sauce, it’s one of the cornerstone flavors of Japanese cuisine. Dashi is a background flavor in a stunningly wide variety of soups and sauces; while you might not be able to tell it’s there, the flavor would be off if it weren’t there, and you’d know something was missing even if you couldn’t pinpoint exactly what.

The dashi I make includes both kombu (seaweed) and bonito flakes (which are basically like fish sawdust). Vegetarians or vegans can leave out the bonito, and I’ve seen vegan dashi recipes that include dried mushrooms, which add a meaty “umami” flavor. This recipe makes about four cups of dashi, enough for two pretty hearty servings of soup.

First off, measure your water (four cups) into a pot and add a piece of kombu. A lot of recipes will tell you to wipe the whitish powder off the outside of the seaweed first, but I usually don’t bother.

(Pardon the filthy yellow pot back there!) Turn the heat up to medium-high. Your goal here is to bring the water juuuuust to a boil in about 10 minutes; this usually requires about medium-high heat, but you’ll have to do some experimenting to figure out the right heat level for your particular stovetop.

Once the water is almost to a boil (again, it will take a little practice to figure out when it’s almost boiling but not quite), remove the seaweed and add your bonito flakes. Bonito flakes are, as I mentioned earlier, like fish sawdust; fish is dried and shaved, and the resulting flakes are used in a variety of recipes (you might have encountered them atop sushi). They come in a bag like this.

I use half a cup of flakes, tightly packed, for this amount of water. Allow the water and the bonito to boil for about ten seconds, then turn off the heat. Let it sit for about two minutes.

Then strain the dashi through a sieve into a bowl.

Press on the bonito flakes with a fork to extract all the fishy goodness.

Voila, dashi! This will form the base of your soup. Easy, eh? You can let it sit around for a little while at this point, while your rice is cooking or whatever. You can also refrigerate it for a couple of days.

Incidentally, this variety of dashi is called ichiban dashi, which means “first fish stock.” You can also make niban dashi, or “second fish stock,” by repeating this process with your used kombu and bonito flakes. Ichiban dashi is clearer than niban dashi and is considered to have a more refined flavor.

The other thing I do at this stage of the proceedings is soak my wakame seaweed. You can get wakame either dried or salted; I prefer the salted kind, which is harder to find, but, in my opinion, has a chewier, more toothsome texture than the dried. I cut it up into little bits with kitchen shears because it expands a LOT while soaking, and if you don’t cut it up ahead of time you’ll end up with massive seaweed noodles that can be chewed by neither man nor beast.

Put your cut-up wakame in a cup or bowl and add fresh water to cover.

Once it’s all expanded (this will take 15-30 minutes or so), drain and rinse it. Voila!

(This seems like as good a place as any to mention that one of the hazards of asking Mister Principessa to document any cooking process is that I end up with a lot of photos like this

on my camera. And he wonders why I ranked Perrier higher than him on my list of things.

Perrier never attempts to take pictures of my boobs while I’m doing dishes.)

When you’re ready to make your soup, add the dashi back to the pot and bring it just to a simmer over about medium heat.

Clean out your sieve, too, because you’re going to need it. And get out your miso.

Now, the miso situation could be its own separate entry. In fact, although I’m too lazy to do the research, I’m going to go out on a limb here and speculate that entire BOOKS have been written about it. There are several kinds, so you’re going to want to do some experimenting until you find one you like. I usually go with either a light (or “white”) shiro miso, or awase miso, which is still fairly light but has a deeper, richer, saltier flavor than shiro. Awase is my favorite, but if you like a lighter flavor, shiro is the way to go. Miso is usually found in plastic tubs or in bags like this.

All right! Now that your dashi has come up to a simmer, turn off the heat and wait for it to stop bubbling. Miso is a living food, not unlike yogurt, and it’s full of all kinds of little probiotic fellas who will react poorly to cooking, which is to say they will die, thus depriving you of all their lovely health-enhancing properties.

Once the dashi has calmed down, put your sieve over the pot so some of the dashi comes up through it. You’re going to use the sieve and hot dashi to “melt” the miso and strain it at the same time. The purpose of the sieve is to catch all the little chunks of grain (barley and/or rice) that are in the miso; you don’t HAVE to strain it, but I personally am not a big fan of finding a bunch of grainy sludge at the bottom of my bowl when I’m done with my soup.

Add enough miso to suit your taste. I use about two big tablespoons for this amount of dashi. You might want to use more or less, depending on how salty you like things and the kind of miso you’re using.

Mix the miso with the dashi in the strainer, and sort of mush it around until it’s melted into the stock.

Then stir in your wakame, cubed tofu (allow this to heat through before eating), and/or green onions, if using. I like all three, but this time we did a very simple soup with just wakame. (Plus, it’s hard to get the tofu past the Mister; he likes it, but it tends to retain heat and become, as he puts it, “heat bricks.”)

And there you have it! Soup! Soup! A tasty soup! Soup!

As usual, I failed to take a picture of this in bowls. So, since that last picture isn’t all that appetizing, I’ll leave you with this one of me in our tiny kitchen. Note Alice in Wonderland Christmas ornament to the left. Yeah, we classy.

Published in: on November 10, 2010 at 8:35 am  Comments (18)  
Tags: ,

A Few Of My Favorite (Japanese Food) Things

This post is long and picture heavy, so you might want to get yourself a little snack and a beverage and go to the bathroom and everything. It also has gratuitous photos of raw fish, so avert your eyes if you’re squeamish about that kind of thing.

As I mentioned before, Mister Principessa and I visited the Japanese market this weekend. There are a couple of major Japanese market chains here in southern California: Mitsuwa and Marukai. We’ve been to both several times, and we’re partial to Marukai, mostly because they take their grocery selection REALLY seriously. Mitsuwa has Japanese groceries too, but they dedicate a lot of space to other stuff–books, pop culture-y items, gifts. It’s almost like a Japanese mini-mall that just happens to sell groceries.

Marukai, on the other hand, is like a huge Japanese grocery store with other stuff (electronics, ceramics, kitchen gadgets) around the perimeter. We’re lucky to live within half an hour or so of what we call “The Big Marukai,” which is to say, the two-story one in Gardena. It’s really massive, and it has TONS of groceries–mostly Japanese, but some Hawaiian goods as well.

All that selection can be kind of intimidating, particularly if you’re a white girl who doesn’t speak or read Japanese and isn’t familiar with Japanese food beyond Pocky and Kasugai Gummy Candy. So I thought I’d do a post about my favorite Japanese foods. I hadn’t tried ANY of this stuff prior to hooking up with the Mister way back in 2004. But I’m pretty open-minded about food, so I tried anything he recommended, and now I love lots of different Japanese foods. (Not natto. Tried it, thought it tasted like soggy coffee beans injected with cigarette smoke, rabbit poo, and evil, and opted not to try it again.)

Pretty much my favorite Japanese meal in the universe is sashimi. And luckily, it’s also one of the easiest to put together. I’ve read that Japanese food is “the original slow food,” but not sashimi. Making sashimi goes like this:

Step one: Buy raw fish.
Step two: Slice.
Step three: Eat.

Sashimi’s one drawback is the price. You can’t eat just any old fish raw; you need sashimi-quality fish, and it ain’t cheap. The Mister is partial to salmon, which is usually pretty reasonably priced, as you can see by the “per pound” price here:

My favorite, on the other hand, is bluefin chutoro. Toro is the general term for the the fish’s fatty underbelly; otoro is the fattiest and most highly prized cut, and chutoro is the next grade down. Toro has an incredible, melt-in-your-mouth texture and, as you might have guessed, is priced accordingly:

In my defense, I would like to note that this amount of fish is plenty for two meals. So, the price here came out to be just about $10 a meal, which is totally reasonable, considering the price of bluefin toro in sushi restaurants.

Here’s how complicated it is to prepare sashimi:

Easy! Also: YUM.

One of our favorite sashimi accompaniments is tamago, a sweetened, rolled omelette that you may have had in sushi form–that is to say, with a hunk of rice attached to it. There are a lot of ins and outs and what-have-yous when it comes to sushi terminology, but it’s probably sufficient to know that nigiri sushi is the kind with rice on the bottom and sashimi is raw fish served by itself. We eat tamago sashimi-style, in slices. You can probably find tamago pre-made at your local Japanese market, but the Mister likes to do things the hard way–I mean, “the right way”–and make it by hand.

He also really likes it when I take pictures of him and threaten to post them on the Internet.

Charming.

So that pretty much covers our main course. We usually have a few little side dishes with sashimi too, such as kamaboko.

Kamaboko is a steamed or fried fish cake. If you’ve ever had Japanese soup and it had fishy stuff in it that came in half-moon-shaped slices that were white on the inside and pink on the outside and looked like this

that’s kamaboko.

I also really like seaweed salad.

The Mister and I used to go to a sushi bar that served us seaweed salad with ika sansai (seasoned squid) in it. So we started preparing it that way at home.

We like to fancy this up with La-Yu chili oil and regular old sesame oil, and sometimes rice vinegar.

It’s also nice to have a few kinds of pickles with sashimi. The Mister’s favorite kind is hari hari zuke, a bright yellow pickle that’s usually made with daikon radish but can also include other kinds of vegetables, such as lotus root.

I myself am partial to pirikara daikon, which is somewhat similar to the yellow pickles in flavor, but saltier and more gingery.

Speaking of which, can’t have sushi or sashimi without pickled ginger!

Beverage-wise, I like to pick up Japanese sodas and vitamin jellys at Marukai.

The Mister generally gets a beverage or two of his own.

That’s sake on the right. He insisted I include this picture so you know that he does, in fact, drink decent alcohol from time to time, not just Natural Light.

And then we eat!

With plenty of steamed white rice on the side, of course.

More Japanese food to come later this week, so stay tuned if you’re into that kinda thing.

Published in: on November 8, 2010 at 11:57 am  Comments (11)  
Tags: , ,

Stop! Mango Time.

Well, tomorrow’s Monday, which must mean it’s time for another installment of La Principessa’s Lunchbox Chronicles! This week, I made quinoa salad again, but the recipe for this one came from an actual cookbook rather than from the dark recesses of my brain. Well, sort of. It’s a variation on a recipe from Veganomicon by Isa Chandra Moskowitz and Terry Hope Romero.

(Incidentally, if you’re interested in vegan cooking or just want to incorporate more fruits, vegetables, beans, and whole grains into your diet, I highly recommend this book. It has tons of great recipes as well as a lot of basic cooking information. Wondering how to make vegan gravy, or what the hell to do with those five beets your neighbor just gave you [oh wait, that was MY neighbor]? This is your book.)

First step is to rinse and cook your quinoa. I failed to do the “rinse” part, so I guess we’ll see how much that affects the flavor. (Quinoa has an outer layer that can be bitter, which is why most quinoa recipes instruct you to rinse it before cooking.) Put the cooked quinoa into a big bowl to cool. Make sure it’s a BIG bowl, because you’ll be putting the salad together in it.

Ingredients, assemble!

Here we have scallions, a mango, a can of black beans, and a whole heaping helping of cilantro, along with two ingredients that the recipe doesn’t call for: a jicama and some baked tofu. More on those in a bit.

Peel and dice your mango.

Pretty!

Chop up a cup or so of scallions.

The recipe calls for red bell pepper. But do you know how much use I have for red bell pepper? Or any other color of bell pepper, for that matter? None. So I substitute half a jicama, which is crisp and refreshing and not completely disgusting like some other vegetables I could mention *cough*redbellpepper*cough*. If you’ve never had jicama, it tastes like an apple met a potato and they had a really juicy, earthy-tasting baby. Mmmmm … baby.

Chop up a cup or so of cilantro, and dump it in with everything else you’ve chopped up so far. Unless you’re one of those “eeewww, cilantro tastes like soap and ruins everything” people, in which case … don’t.

Now for the proteiny bits. The recipe calls for one can of rinsed and drained black beans, so add that. I like to have something meaty to chew on too, so I add cubed baked tofu. When I’m REALLY on top of my game, I press and bake my own tofu. I didn’t feel like doing that this weekend, though, so I bought pre-baked tofu at Whole Foods. Oh, the decadence!

Now, for seasonings. Really, the only seasonings I use here are kosher salt, freshly ground black pepper, and red wine vinegar. Oh, and a secret ingredient that most definitely is NOT included in the original recipe, but that I think works really well.

Stir it all up and voila! Lunch for five days!

Insert into face and make little satisfied grunting noises.

Published in: on October 10, 2010 at 1:09 pm  Leave a Comment  
Tags: , , ,

Shawarmalamadingdong

We have an extra-special treat today! My dear Mister Principessa has written a lovely guest post about his latest favorite thing to cook, chicken shawarma. — La Principessa

hello there to everyone who was expecting to read something about makeup.  i am (name tbd) [his name is Mister PrincipessaLa Prinicipessa] [him name is name tbd–name tbd] and i am going to write about food instead… more specifically, Chicken Shawarma, which i was inspired to make after eating a really good sandwich at a restaurant called Open Sesame in Belmont Shore here in Long Beach. (the missus just checked up on me to make sure i am doing okay after her crash course in blogging – “go away”.)

moving right along… makeup does not exist in this dojo. i was trying to think of clever/funny things to write in my first ever blog post but i find i am often these things unintentionally and can’t just produce on command so i will just show you my pictures and tell you what i did.

i actually put this recipe together after looking at 3 different recipes on the webs… i can’t remember who wrote them or where i found them, but i am certainly not taking credit for this dish. i am a good cook, not a great cook, but i can make a few things well… in fact, i am hesitant when undertaking new recipes – i’ll only tackle things that i believe i have at least a 75% chance of not completely screwing up. i’ve made this 3 times now and it’s been pretty good each time… some might say perfection (and by some, i am referring to the missus and myself).

first, you’re gonna want about this much garlic… what i wrote down was “2 cloves” but i really like garlic so here you go. i know you see 6 here, but it’s really more like 4 big cloves.

then, about this much onion… again, i wrote down “1 Tbs of onion”, and this is actually closer to 4 or 5… go with your instincts.

mince the hell out of both of these things…

well, mince the hell out of the garlic, at least… be nice to the onion as it can turn into onion juice if you let it get away from you.

put them in a bowl and tell them to prepare for the onslaught of seasonings…

now you are going to want a lemon. i wrote down “2 Tbs lemon juice” but i always end up using a fist-sized lemon. as you can see, i sort of freestyle ingredients that i’m confident with… garlic, onions, lemon… all good things. and when i say “fist-sized” i don’t mean the fist of a 6 ft something or other… more like gary coleman’s fist.

in you go, all of you…

now, for delicious Tabasco, 1/2 tsp… and yes, that is a Keystone – don’t judge me.

1 Tbs of vinegar

1/4 tsp cayenne pepper… i had written down 1/2 tsp but don’t do this unless you like to sweat while you eat. i usually like spicy foods but there has to be balance… i don’t enjoy burning my tongue and lips and brushing it off like i can take whatever you throw at me.

next, add 1/2 tsp of mace. this is not mace, this is nutmeg. i don’t even know what mace is… it was explained to me but i forgot already. (Mace is the dried covering of the nutmeg seed, which is why nutmeg is an acceptable subsitute.La Principessa)

grindy

next, grind up some pepper… 1/2 tsp. i always use fresh ground pepper for everything unless i’m at Denny’s (don’t. judge me.).

*KERRSH* *KERRSH* (sound of pepper grinding)

and then, 1/2 tsp of salt

now, here’s the weird thing i do: the recipe calls for 1 cup of plain yogurt but i don’t eat dairy because i’m genetically defective and i can’t produce the enzymes to digest it so i take this stuff called Better Than Sour Cream and mix water with it (a remarkably good substitute suggested to me by the missus).

take a fork and grab two heaping things of this stuff…

throw some water in there… this looks gross now but it will be delicious, i swear.

mix, mix, mix… it’s gobby at first, but it WILL smooth out. use a fork, not a spoon, it’ll go much quicker.

before you know it, you will have something that is not quite the consistency of yogurt (a little more watery) and a dairy-free substitute. add it to your marinade ingredients. this stuff will mellow out the spiciness and give the marinade a creamy texture. all you cheese eaters can go eat pizza and wash it down with milk and ice cream, you cheese eatin’ surrender monkeys.

now, get a casserole dish, about this size… the Keystone is strictly for scale – it’s not like people around here actually drink the stuff and it’s not like it’s his 3rd one okay?

now comes the stupid, boring, tedious task of trimming the fat off the pound and 1/2 or so of boneless/skinless chicken thighs. really, at this point, it’s whatever you have the patience for… if you don’t think it gets in the way, leave it on there.

i bought a pack of chicken that weighed 1.38 lbs. and the fat i cut off probably totaled .15 lbs… damn you, Ralphs. damn you to hell.

so. much. effort.

did i tell you to mix the marinade? do that earlier.

i’m travelling back in time a little further to show you this cool shot of spices going to war with fake sour cream. i think, at first, the spices will win, but they eventually put aside their differences and become friends.

at this point, you can taste the marinade before you drop it on the chicken… add more of this or that. if you followed these directions, then this is the flavor i was going for (it is far from authentic lebanese cooking but not really far… like, a couple blocks away from authentic. you could totally fool someone who had no point of reference).

install the marinade and format the chickens…

install firewall to protect against viruses

upload to the server for around 2 hours… btw, i enjoy Miracle Whip, bonito flakes and Starbucks. i will post that recipe another time but i sense you are intrigued…

go play Fat Princess for those two hours. there are chickens in this game, too… i like to stay in the zone.

do not forget to wash your hands, okay? before you grub up my controller.

a couple hours later, it goes in the pan, on medium-high heat… everything goes in…

cook it up on each side until you can stick a thermometer in the chicken and it reads 160 F. try not to overcook the chicken because it will go all tough on you. i usually cook this until the marinade reduces down by 2/3 (there’s still some marinade in there but it kind of caramelizes and gets delicious).

about like this. i just looked through the folder and realized we don’t have a picture of the chicken all nice and plated up… that’s how quick this chicken goes, it’s so good. no time for pictures at this point.

we’ve done some side dishes with this recipe but i don’t know how to make good lebanese rice… at the restaurant, they do this rice/orzo thing and i haven’t figured out the spices, yet. the internet told me to cook it with chicken broth but i know there is more to it than that. if you feel like going the easy route, grab a box of that rice/orzo rice-a-roni something or other (he means thisLa Principessa) and that works just fine. also, at the restaurant, they give me these yellow chile peppers which are really spicy and good but i couldn’t find them so i eat pepperoncinis, which are pretty much the same, only less spicy. it’s for that vinegar-y slap-to-the-face – that’s what you’re going for… i was going to make a salad but the store was out of mint. when i find all my perfect salad ingredients, i’ll let you know how that goes. the end.

A great big thank you to Mister Principessa for the delicious dinner, and a round of applause on his first-ever blog post! I love you sweetie!La Principessa

Published in: on October 6, 2010 at 7:42 am  Comments (4)  
Tags: , ,

Lunchin’ It Up, Vegan Style

As some of you are aware, I embarked upon The Great Vegetarian/Vegan Diet Experiment last year. I really enjoyed it: I loved finding new recipes and ingredients to try out, I had tons of energy, my cholesterol dropped like 40 points, and I felt great. That is, until my innards exploded in a painful, ongoing bout of what was eventually diagnosed as Irritable Bowel Syndrome. My suspicion is that the rapid diet overhaul was too much for my poor intestines to handle, and they rebelled by making it painful and … let us say, “unpleasant” to digest anything more fibrous than a saltine cracker.

After many doctor’s visits, a litany of tests, and several months of bland, largely fiber-free food, the situation is starting to improve, and I’m finding myself leaning in a vegetarian/vegan direction again. I probably won’t go 100% vegan (for one thing, I’m no longer cooking only for myself, and Mister Principessa is pretty fond of his eggs and bacon), but I would like to get back to eating that way as much as possible. I typically eat breakfast and lunch by myself, so it’s easy to have vegan food for those meals.

The only problem with this style of eating is that vegan food –at least the kind I like to cook and eat–takes quite a bit of thought, preparation, and time. Sure, you can be a “junk food vegan” and subsist on corn chips and Skittles, but where’s the fun (or health benefits) in that? I’ve found that I can save myself considerable grief during the week if I prepare my breakfasts and lunches in advance over the weekend. Then during the week, those two meals require no more thought or effort than it takes to reach into the fridge and pull out a Tupperware container. In other words, none whatsoever.

This week for lunch, I’m going to be eating a quinoa salad that I invented last year. Let’s take a gander, shall we? Be advised, this post is rather picture heavy.

First of all, you’ll need to cook some quinoa. One cup works well for this amount of salad. Nothing magical about cooking quinoa; it’s just like cooking rice or any other grain but takes waaaaay less time. Then set it aside in a big bowl (I use a large mixing bowl). I generally add salt and pepper at this point.

I like to put eggplant in this salad, and my favorite way to prepare it is to roast it. No trick to this either. Cut your eggplant in half lengthwise,

then stick it in a 350-degree oven and cook until done, generally 20-30 minutes.

Onions are a good addition to almost any salad. Red onions or scallions are my favorite in this one. Just slice ’em up …

… and chuck ’em in!

I’m a sucker for leafy greenery in salads, so I generally put kale in this too. I steam it in a pot using the smallest amount of water possible; really, I just wilt it, which you can do using pretty much just the water that’s left on the leaves after you wash them.

Stir it around so it all wilts, adding teeny splashes of water if necessary.

When it’s ready, dump it in the bowl with the quinoa.

I also like tomatoes in this.

Quinoa is pretty high in protein, but to add even more, I like to include a can of drained and rinsed chickpeas. I’ve also made this with lentils and baked tofu, both of which work very well. Or if you’re not tied to the whole “vegan” thing, chopped hardboiled eggs or cooked chicken would be good too.

You, being smarter than I am, will surely remember to add your damn eggplant. I forgot it and had to go back and add it at the end. So in your mind, please insert a picture of me cutting the eggplant into cubes here:

and adding the cubes to the bowl here:

On to the dressing! You could mix up a simple vinaigrette for this, or even use store-bought dressing. I like to dress this salad in the laziest way possible, which is to say I just add seasonings directly to the bowl, stir, and hope for the best. If you season it pretty lightly to begin with, you can adjust it to suit your taste. I usually add …

Kosher salt

Several grinds of black pepper (please, for the love of all that is right and good on this earth, do not use pre-ground pepper, ever, for anything … it is dusty and worthless)

A few small pinches of cayenne … I’m kind of a heat wimp

Red wine vinegar

And a wee drizzle of olive oil.

Stir it all up good!

Again, kindly pretend there’s eggplant in there.

And now for my favorite part. The divvying! I like to put the salad into five separate containers, which minimizes the amount of brain power I have to expend on my way out the door at 6:30 in the morning.

Action shot!

SSSSUUUUUUP-EEERRRR MACRO!

And that’s it! Easy, healthy, and practically infinitely variable. And vegan to boot! Win win win win!

Published in: on October 3, 2010 at 8:53 pm  Comments (4)  
Tags: , , ,

Let’s Make Scones!

Yes, it’s that time again (I refer to it as “the weekend”) when, rather than posting about things that I put on the outside of my body, I post about something that goes into it (not that, you dirty, dirty pervert). That’s right … it’s Food Post Time!

There’s been a distinctly nippy quality to the morning air of late, which tends to put me in the mood to do a little baking. I’d actually been thinking about making bread, but when I checked the fridge … no yeast. So I consulted with the Mister, and we determined that scones were in order.

This is an extremely simple recipe. So simple, in fact, that I’ll give you the whole thing right here:

  • Two cups self-rising flour
  • Two tablespoons butter
  • 1/2 cup water
  • 1/2 cup milk
  • A teaspoon or two of sugar if you like your scones on the sweet side (optional)

A few notes: Maybe I’m not looking hard enough, but I have never in my life seen a bag of self-rising flour at the grocery store. I think it’s more common in the UK and in the southeastern US. You can make your own by adding 1 1/2 teaspoons baking powder and 1/2 teaspoon salt to each cup of flour. So, for this recipe, that translates to 2 cups flour plus 1 tablespoon baking powder and 1 teaspoon salt.

Also, this recipe calls for butter and milk, but you could easily veganize it by using vegan margarine and soy/rice/almond/your choice of non-milk milk. The Mister and I are both lactose-intolerant to varying degrees, so we don’t keep fresh milk around; for this recipe, I used 2 tablespoons of dry milk powder and 1 cup of water as the liquid.

First off, preheat your oven to 425 degrees. Now, my oven is old. I mean, OLD.

Which basically means that it’s a metal box with a fire in the bottom. It runs pretty dang hot, so I heat it up to more like 385 degrees for this recipe (between 375 and 400).

If you live in the Land of No Self-Rising Flour like I do, the first thing you’ll want to do is mix up your dry ingredients. Here we have flour, salt, baking powder, and dry milk, all whisked together.

Next, cut up your butter into small pieces–say, 8 of them. Touch it as little as possible; the idea is to keep it very cold and not to let the heat from your fingers melt it. I believe this is because you want the butter to melt in the oven and create steam, which helps to make the scones flaky–it’s the same basic idea as making pie crust or biscuits.

Plop your butter chunks into the flour.

Now comes my favorite part:

Haul out your trusty pastry cutter (or two knives) and cut the butter into the flour until it looks like crumbs. You can also do this part in a food processor, or just rub the butter in with your fingers.

Behold my sexy do-rag, sweatshirt, and weird facial expression! Hey, it ain’t all Pixie Epoxy and Naked palettes up in here.

Next, stir in your liquid. As I mentioned, I used all water plus dry milk powder here because I never have fresh milk around. I think some recipes use cream too. Not this one–this recipe results in fairly lean scones.

It is VERY IMPORTANT that you not overmix scones. You don’t want to develop the gluten (i.e., the protein) in the flour because that will make them tough. You want to mix just enough that the dough comes together. Then, dump it out onto a floured surface and knead it very gently, just a few times, to bring the dough into a cohesive mass.

Action shot!

Then, pat your dough out into a circle maybe 10 inches across, and cut it into wedges. You can see here that my dough came out pretty wet. It was a pain to work with, but the scones came out fine.

Transfer your scones very carefully to a greased baking sheet.

Bake them in your preheated oven for approximately 10-12 minutes. When you’re baking, it’s really important to know your oven and trust your senses. If they smell done after seven minutes, check them! When they’re ready, they will be nice and toasty brown, and they will sound hollow when you tap them on the bottom (unlike the Mister, who sounds like “Hey, knock it off, I’m doing dishes!” when I tap HIM on the bottom).

For extra Suzy Homemaker points, serve with chicken sausage omelettes and homemade blueberry jam! (By the way, if you’re at all interested in canning but don’t have the setup or the inclination for the whole sterilizing jars/boiling business, I have two words for you: FREEZER JAM. If you can mash fruit, stir, and scoop things into Tupperware containers, you have all the skills necessary to make freezer jam.)

And then STICK IT IN YOUR FACE!

Published in: on September 5, 2010 at 7:12 pm  Comments (4)  
Tags: ,